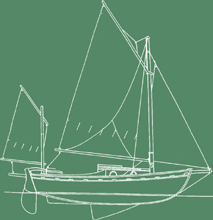
Yowzah, do we have backbone. This thing is going to be solid like Russian tractor, minus about three wheels.
We had threatened pictures, and here they are. Regular readers will recall that when last we left our heroes, they had put the last three frames in place, but hadn't taken pictures. The first picture shows the aft frames (6 through 8) in place.
Last night, Courtney and Buster epoxied and screwed the hog into place. Everything lined up very carefully, by Wavey Creek standards anyway. Admire the lovely hog in the first two photos. Look at the second photo in particular - see how straight? Ooooooh. Aaaaaah.
But wait, you say. What's that thing sticking up forward from the hog, you say? The thing with all the clamps on it? Well might you ask. It's the apron, epoxied and clamped and happy to be where it belongs. You can get a better view in the next picture.
Isn't that awesome? Note how nicely frame 1 lines up with the centre-line. That took a bit of doing. The joint between the apron and the hog was a bit fiddly too, but it came out OK. A bit of fairing, maybe some bolts through the joint just to be extra safe (we'll see though, Buster thinks that will actually weaken it), and Bob's your uncle. Well, actually, Bob's Courtney's uncle. Hi, Bob!
One more picture, this one taken from a ladder (this is what happens when Courtney gets a camera in his hands, folks) on the starboard side. The skeleton of our boat is almost complete - doesn't it look like a little whale? We like to think so.
The transom is next; if you look closely you can see the transom knee in the first picture, just roughly clamped in place. Have to consult with Buster before tackling the transom, though, so that's it for this weekend. Cheers!
Saturday, April 28, 2007
Wednesday, April 25, 2007
So I changed my mind. It's allowed.
Courtney here - I realise that just a couple of days ago I was thinking the hog would be next. I went out to Wavey Creek after work last night, though, and decided to put up the rest of the frames first. I am pleased to report that the frames we cleated together on Sunday are trimmed and sanded, and all frames are now in place and level. We also cut and beveled frames 2, 6, 7, and 8 to make space for the hog.
I was going to take a picture, but I'm going to wait until we attach the hog (which really IS the next job) and maybe the apron. THEN you'll see some boaty goodness, just you wait and see. It's gonna have a hot tub, and a mini-bar, and a pony...
Monday, April 23, 2007
That's the way it's supposed to be!
Wow, did we have a good boat-building day yesterday. We made some final adjustments to both sides of frame 3, and attached and adjusted frames 4 and 5. Then we made plywood cleats to hold the port and starboard pieces of frames 6 and 7 together, put the frame halves and cleats together with screws, and took them apart again.
Then it was epoxy time - we filleted frames 4 and 5, then epoxied the cleats and frame halves (6 & 7) and screwed them back together. We observed an interesting phenomenon for the first time - Courtney was holding a container with two "shots" of epoxy in it, and because the heat didn't dissipate quickly enough, the whole container set in a few minutes and had to be chucked out. This, kids, is why we don't hold epoxy containers by the base, we hold them by the tops.
So now the boat is back to looking more like the photo (stolen from below, 'cause we were too lazy to take more pictures), with all frames attached back to #5. Next I think we'll attach the hog, which will give us some fore-and-aft control of frames 6, 7, 8, and the transom. Look for increasingly boaty goodness in the next few posts!
Thursday, April 19, 2007
No pix today...
...but if you want to imagine what the boat looks like right now, just remove frames 4 and 5 from the "3-D" shots in the last post. That's not as dire as it sounds; allow me (Courtney) to explain.
When we took the last photos, everything was "pretty close" to lined up, and it was temporarily clamped in place. There were a couple of problems, though:
By last night, I kinda figured that our parts were precise enough that we could attach them and they'd be pretty close, but first we had to reset the laser level, re-level frame 1 (which still isn't attached to anything except the construction frame), and fix the joint between frame 2 and the CP case. This latter task involved backing out the screws, shimming the joint, packing it with epoxy/wood flour filler, tightening the screws again, and filleting both sides of the joint with fibreglass and epoxy.
THEN we could try attaching both sides of frame 3 with itty bitty brackets and screws, twisting the CP case into the right alignment, and checking the level. Vindication - everything lined up just fine, so we filleted the joints of frame 3 (forward sides only, the aft sides still had brackets on them). We'll do the same thing for both sides of frame 4 once it's lined up properly, filleting the aft sides of the frame 3 joints and the forward sides of the frame 4 joints, then move on to frame 5... which by now we have good reason to believe will pull the whole structure into pretty fine alignment.
But sometimes it feels like nothing is ever easy. This whole boat-building thing is a good lesson in patience, cleverness, and foresight.
When we took the last photos, everything was "pretty close" to lined up, and it was temporarily clamped in place. There were a couple of problems, though:
- frames 3 & 4, which are in two halves and butt up against the CP case, were not precisely in place;
- the joint between frame 2 and the CP case wasn't plumb; and
- the tripod with the laser level was bumped by the shop door and knocked out of alignment.
By last night, I kinda figured that our parts were precise enough that we could attach them and they'd be pretty close, but first we had to reset the laser level, re-level frame 1 (which still isn't attached to anything except the construction frame), and fix the joint between frame 2 and the CP case. This latter task involved backing out the screws, shimming the joint, packing it with epoxy/wood flour filler, tightening the screws again, and filleting both sides of the joint with fibreglass and epoxy.
THEN we could try attaching both sides of frame 3 with itty bitty brackets and screws, twisting the CP case into the right alignment, and checking the level. Vindication - everything lined up just fine, so we filleted the joints of frame 3 (forward sides only, the aft sides still had brackets on them). We'll do the same thing for both sides of frame 4 once it's lined up properly, filleting the aft sides of the frame 3 joints and the forward sides of the frame 4 joints, then move on to frame 5... which by now we have good reason to believe will pull the whole structure into pretty fine alignment.
But sometimes it feels like nothing is ever easy. This whole boat-building thing is a good lesson in patience, cleverness, and foresight.
Tuesday, April 10, 2007
Assembly du jour
This is exciting! Tara, Courtney, and Ron went out to Wavey Creek on Easter Monday and sealed the patched and sanded frames. Ron, Courtney, and Courtney's dad Buster also braved the dodgy ice of Wavey Creek to put up a wood duck nesting box on the far side of the creek from the boatyard, er, house.
Courtney went out after work tonight (April 10th) and he and Buster actually started putting frames etc. together. We weren't sure this method was going to work, and it seemed a bit questionable at times, but everything came together amazingly.
See, we had this reasonably sturdy and square (well, I said "reasonably", didn't I) construction frame. To that we fixed 2x2 posts to hold the frames themselves. We tried snapping a chalked centre-line down the construction frame, but a stretched Piece! Of! String! (any other Jonathan Lethem fans out there?) did the job much better. Hold a plumb bob on the centre-lines marked on each frame, line 'em up to the string, and your frames are centred and plumb. But what about levels?
Heh. Well, let me tell you about what might be the best-spent $50 of the whole boat-building adventure: a tripod and a cheapy-do (but tripod-mountable) laser level. Yes, tripods... with frickin' lasers on their heads. (Any other John Christopher fans out there?)
It was brilliant. It was shiny. It was, well, red and coherent. (Not like Courtney, who is well-read and incoherent.) Best of all, it could be set to the correct reference waterline (identified on the plans as waterline 3, if this blog lasts long enough for someone to play along at home)... and used to line every frame up to the same level. It made a hairy job slightly less hairy, I'll say that. The second picture shows the tripod and level; the third shows the laser line as used to line up frame 5 ("The Big One").
Note the CP case sticking out of frame 5. We butted it up against frame 2, propped up the aft end, roughly fit the two sides (each) of frames 3 and 4 to the CP case, wondered how the hell it was all going to line up properly, and swore a fair bit. But then frame 5 ("The Big One" - there's a special sound effect, you know) saved the day. It's all one piece, you see, and once we'd made a nice snug cutout for the CP case, and centred it, and leveled it, and corrected the twist in the CP case (to Wavey Creek tolerances)... suddenly everything lined up!
I tell you, it was one of the best moments of my life. This thing might actually work after all. Enjoy this side view of the CP case and frames. We stopped after frame 5, but the last three should go together reasonably quickly. They're just clamped for now, pending the application of the hog and the apron and the transom and the stringers... but at long last, we have something shaped like a boat!
Tuesday, April 3, 2007
Tired. Happy, but tired.
Saturday night, March 31st, Courtney's band Venus Murphy played three sets at a local pub. The show was a smashing success, splendid time guaranteed, but it was pretty tired out by the time we were done. This probably explains why Courtney and Tara didn't get up to Wavey Creek to work on the boat until, well, some time after noon the next day.
So we didn't get a ton of work done. The things we did accomplish are pretty exciting, though. At left you can see the centre-plate case, finally assembled. We're getting very close to actually putting the various pieces together.
To the right is one of the frames (this one is number five), sitting on top of the freezer for some final patching before we assemble everything. We'll be putting in some good long boatbuilding days over the Easter long weekend, and final patching and smoothing of the frames is probably the first job we'll try to get through.
Then we'll start attaching the frames to the construction frame, which is pictured on the left. At that point, the boat really starts taking shape, so there will be lots of pictures. The shop door is in the background (you can probably see the CP case back there, too); the bow end of the construction frame is in the foreground.
Finishing the construction frame felt like a really major step, even though we didn't actually do that much work on Sunday (Courtney sez "Tell that to my knees", 'cause he was kneeling on concrete to screw the construction frame together...). We can't wait to start putting the "big picture" together!
Subscribe to:
Posts (Atom)