This is exciting! Tara, Courtney, and Ron went out to Wavey Creek on Easter Monday and sealed the patched and sanded frames. Ron, Courtney, and Courtney's dad Buster also braved the dodgy ice of Wavey Creek to put up a wood duck nesting box on the far side of the creek from the boatyard, er, house.
Courtney went out after work tonight (April 10th) and he and Buster actually started putting frames
etc. together. We weren't sure this method was going to work, and it seemed a bit questionable at times, but everything came together amazingly.

See, we had this reasonably sturdy and square (well, I said "reasonably", didn't I) construction frame. To that we fixed 2x2 posts to hold the frames themselves. We tried snapping a chalked centre-line down the construction frame, but a stretched Piece! Of! String! (any other
Jonathan Lethem fans out there?) did the job much better. Hold a plumb bob on the centre-lines marked on each frame, line 'em up to the string, and your frames are centred and plumb. But what about levels?
Heh. Well, let me tell you about what might be the best-spent $50 of the whole boat-building adventure: a tripod and a cheapy-do (but tripod-mountable) laser level. Yes, tripods... with frickin' lasers on their heads. (Any other
John Christopher fans out

there?)
It was brilliant. It was shiny. It was, well, red and coherent. (Not like Courtney, who is well-read and incoherent.) Best of all, it could be set to the correct reference waterline (identified on the plans as waterline 3, if this blog lasts long enough for someone to play along at home)...
and used to line every frame up to the same level. It made a hairy job slightly less hairy, I'll say that. The second picture shows the tripod and level; the third shows the laser line as used to line up frame 5 ("The Big One").
Note the CP case sticking out of frame 5. We butted it up against frame 2, propped up the aft end, roughly fit the two sides (each) of frames 3 and 4 to the CP case, wondered how the hell it was all going to line up properly, and swore a fair bit. But then frame 5 ("The Big One" - there's a special sound effect, you know) saved the day. It's all one piece, you see, and once we'd made a nice snug cutout for the CP case, and centred it, and leveled it, and corrected the twist in the CP case (to Wavey Creek to

lerances)...
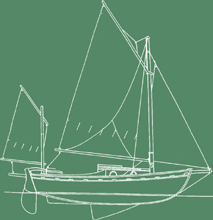
suddenly everything lined up!I tell you, it was one of the best moments of my life. This thing might actually work after all. Enjoy this side view of the CP case and frames. We stopped after frame 5, but the last three should go together reasonably quickly. They're just clamped for now, pending the application of the hog and the apron and the transom and the stringers... but at long last, we have something shaped like a boat!
 ...Happy Birthday to you / Happy Birthday, dear Shilling / Happy Birthday to you! (Courtney wanted pictures of cake and candles, but Tara said no.)
 of you who don't have Boxing Day) was our Shilling's first birthday, in the sense that we started work on December 26th, 2006. Like most one-year-olds, the Shilling still doesn't talk much, doesn't get around all that easily, and isn't allowed to drive yet.
 We're almost done planking (man, I'm getting tired of saying that), as you can see from the portside shot. We're still looking almost sane, as you can see from the picture of both of us. That's probably about all we can ask for at this point. (And more coffee - we can ask for more coffee. It's very morning out.)