Friday, December 7, 2012

Friday, September 23, 2011
Major update, or "Sorry it's been forever!"
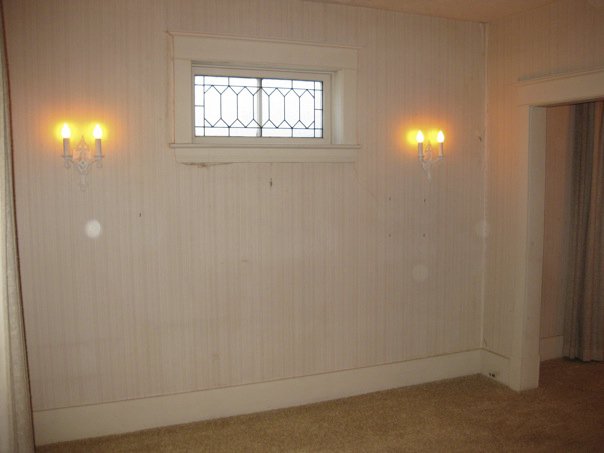 So, um, yeah, we bought a house. Almost (yikes!) two years ago now. We spent the first month after we took possession working frantically to get some "de-beigeing" done before we moved in. It was beige, beige, beige... beige carpet, beige wallpaper, beige
  drapes, beige paint on the trim... beige. (That's a pretty funny looking word when you repeat it enough times, but I think that's true of almost any word.) See the lovely beige music room to the left, and the lovely beige living room to the right.
Once the wall
 paper was off, and the carpet was up (revealing nice oak floors), we could see hints of what the house used to look like
 . We had already chosen the colours for the music room and living room, and were somewhat surprised to see that the original wall colours were quite similar, but reversed. Here are some pictures of the music room and the l
 iving room just before the first winter solstice party in the new house. It's a small house, but it's looking pretty good.
We both like to read, and we have a lot of books, so we needed a good set of bookshelves. We decided to make one wall of the dining room all bookshelves, using a design of my ow
 n that minimizes materials (and costs) while providing sturdy, custom-sized shelves to fit any space. Here are a couple of shots of the dining room with the bookshelves visible. We also re-covered the floors in the back half of the house, painted the bedrooms and kitchen and dining room, and a bunch of other stuff we don't have pictures of (like new lighting throughout).
The house looks a lot different when the lights are low and it's full of musicians! It's great to have a space just right for good friends, good whisky, good music, and good times. Hooray, Little House In The Ghetto!
I don't have any pictures yet, but the latest job on the house was the front porch. We cleaned it out (maybe the biggest job, as there had been a lot stored in there since we moved), took up the old carpet, cleaned and sanded and painted the floor (a Sedona-style almost-orangey red), built a daybed (Mexican blue), set up a table and chairs, and hung up our Mexican hammock chairs. The last job is some Mexican-themed lighting, but we're not done with that yet.
The next major phase of renovations is the creation of bedroom and entrance closets, together with finally refinishing the hardwood floors in the bedrooms, entrance, music room, and living room. We'll tackle that once the winter holidays are over. In the meantime, I'm back working on the boat. (Remember the boat? There's a blog about the boat...)
 Needless to say, the poor neglected boat was a bit dusty when I got 'round to working on it again. I cleaned it out and tackled various chores in and around the cockpit - a
  pair of lockers forward, which have some complicated and fiddly bits, levelling the bilges and installing a garboard drain and bilge pump (not quite done this yet), fitting two sets of locker lids (one set built from scratch), and putting in floorboards.
I'
 ll leave off this post with a couple of photos from last night showing the floorboards installed; they're removable, which is good, because I still have some work to do underneath. In the picture looking forward you can see the two small lockers on either side of the CP case; I'm almost finished the coaming that keeps water out of the locker
 s. The angled shot looking aft gives a good view of the hatches allowing access to the under-seat lockers.
So that's about it for now - I'll try to update the blog more often now that I'm working on the boat regularly. It's been a long wait but I'm going to push hard to get as much work done as I can this year. Cheers!
Thursday, January 21, 2010
News update
I wish I had some boat pix to add here, but I don't. Hold on, hold on, there's a good reason for that!
It all started with Tara's birthday. I won't say the number, but it was a big one, and she decided there was no way she was spending her birthday in Winnipeg. We tossed around various options (I figured we could just head out to Wavey Creek and work on the boat, but for some reason she wanted to go somewhere warmer) before settling on Mexico.
So there we were, all set to head off to Playa Del Carmen the next morning, when all of a sudden we bought a house.
Oops.
Two glorious weeks of sun and sand and warm Mexican hospitality later, we returned to hideous cold and the dawning reality that we had a LOT of work ahead of us. The boat has been sidelined until we are settled in the new place (sorry, Dad! Wait, no I'm not, he's fishing in the Bahamas and doesn't need my sympathy!). Since we took possession we've been removing 100+ years' worth of load-bearing wallpaper/paint/plaster sandwich, patching, sanding, painting, arranging plumbing, electrical, and alarm upgrades, and generally spending waaaaay too much money at Home Despot. Also time... for a while there we were going every day, which is too often even though it's close.
So that's why I haven't updated the boat blog. Come hell, high water, or complete burnout, we'll be moved into the new place by the end of this month (because we have no choice, ha!). We'll need a bit of time to get settled in, but I hope to get back to work on the boat in February. In the meantime, I'd like to welcome new readers and assure you that the blog WILL continue shortly.
Oh yeah, I'll post some pix of the house when we're done painting, too.
It all started with Tara's birthday. I won't say the number, but it was a big one, and she decided there was no way she was spending her birthday in Winnipeg. We tossed around various options (I figured we could just head out to Wavey Creek and work on the boat, but for some reason she wanted to go somewhere warmer) before settling on Mexico.
So there we were, all set to head off to Playa Del Carmen the next morning, when all of a sudden we bought a house.
Oops.
Two glorious weeks of sun and sand and warm Mexican hospitality later, we returned to hideous cold and the dawning reality that we had a LOT of work ahead of us. The boat has been sidelined until we are settled in the new place (sorry, Dad! Wait, no I'm not, he's fishing in the Bahamas and doesn't need my sympathy!). Since we took possession we've been removing 100+ years' worth of load-bearing wallpaper/paint/plaster sandwich, patching, sanding, painting, arranging plumbing, electrical, and alarm upgrades, and generally spending waaaaay too much money at Home Despot. Also time... for a while there we were going every day, which is too often even though it's close.
So that's why I haven't updated the boat blog. Come hell, high water, or complete burnout, we'll be moved into the new place by the end of this month (because we have no choice, ha!). We'll need a bit of time to get settled in, but I hope to get back to work on the boat in February. In the meantime, I'd like to welcome new readers and assure you that the blog WILL continue shortly.
Oh yeah, I'll post some pix of the house when we're done painting, too.
Saturday, October 3, 2009
Finished guitar cabinet!
 Brought all the pieces home and put them together this evening with a bit of help from buddy Mark. First, for Kerry and James and everyone else who was confused about the "hockey sticks", this picture (blurry as it is) should make things a little more clear. You can see the T-bolt at the top - that slides in a mitre track - and you can see the yoke at the bottom, which holds the instrument. The idea was to suspend the instrument directly below the T-bolt and leave room for the biggest peghead of which mere humans can conceive.
 I'm still missing one guitar that should be in there - I have to get it back from a friend - but the second picture shows the cabinet in all its glory, lit up with the internal fluorescent and basically doing its thing. I have to play around with the order of the guitars a bit more, but you certainly get the idea.
I'm really pleased with how this turned out!
(Oh yeah, because I know someone will ask, the instruments from left to right are: 1971 Martin D-28, 2007 Morgan CM, 1980ish Fender dreadnaught, Songbird tenor banjo, Ibanez bass guitar, Godin LG electric, Godin A8 mandolin.)
Sunday, September 27, 2009
This is looking AWESOME!
The guitar cabinet is almost done - just another coat or two of finish and it's good to go. I'll leave the detail pictures for the final post (once I have it home and full of guitars), but here are a couple to show what we've been up to.
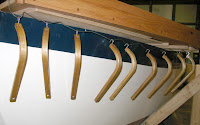 First, here is a shot of the laminated ash yoke holders ("hangers" or "hockey sticks") after their second coat of varnish. I really like how they came out, and if they end up being stiff enough, I may not even need retaining rings on the yokes. Oh yeah, that's a boat in behind there... remember the boat? I'll be back working on the boat next week.
 The second shot (taken a couple of days earlier) shows the major pieces assembled (sides, base, shelf, top, and doors). After testing the doors and installing the cedar on the top of the shelf, we took the whole thing apart for light installation, hole filling, and a couple other small jobs. Then it was final sanding and first coat of varnish, which is now on.
I'm hoping Dad will throw another coat of varnish on this puppy - it might be the last one, or I might have to put one more on later. Either way, I should have it home and full of guitars by next weekend. W00T!
 First, here is a shot of the laminated ash yoke holders ("hangers" or "hockey sticks") after their second coat of varnish. I really like how they came out, and if they end up being stiff enough, I may not even need retaining rings on the yokes. Oh yeah, that's a boat in behind there... remember the boat? I'll be back working on the boat next week.
 The second shot (taken a couple of days earlier) shows the major pieces assembled (sides, base, shelf, top, and doors). After testing the doors and installing the cedar on the top of the shelf, we took the whole thing apart for light installation, hole filling, and a couple other small jobs. Then it was final sanding and first coat of varnish, which is now on.
I'm hoping Dad will throw another coat of varnish on this puppy - it might be the last one, or I might have to put one more on later. Either way, I should have it home and full of guitars by next weekend. W00T!
Sunday, September 20, 2009
Introducing: The Moaning Chair!
So I understand that wooden boat builders (and maybe woodworkers in general) have this concept known as the "Moaning Chair". It's where you sit and contemplate your latest really serious screw-up. Sooner or later everyone gets their turn, and mine was today.
See, the top of the cabinet and the shelf across the middle (which forms the bottom of the actual humidifier and guitar display portion) each have a 2x4 running across the front. This provides stiffness and room for lighting and space for the glass doors to run in. The three cross-pieces (the base, the shelf, and the top) were all carefully cut to 54" wide, that being my determination of the optimal width in which to hang eight guitars without having them too close together or making the cabinet really huge. I mean, I still need space for bookshelves on either side, right? (To say nothing of the mini-bar.)
The tricky part, though, is that the 2x4 on the shelf has to have space cut out for the stiffeners on the sides of the cabinet... whereas the 2x4 on the top is supposed to overlap the sides (the stiffeners butt up against the top 2x4). So I carefully calculated the amount of 2x4 that would fit between the stiffeners (this is last Wednesday)... and then cut the whole thing off that length, which is a bit under 53". And then made cutouts for the stiffeners. I did this, you see, because I am dumb.
Now, it wasn't the end of the world; we hadn't assembled the shelf or the top. It was a pretty simple matter to trim the other pieces accordingly, and we were back on track in half an hour or so. I've lost around an eighth of an inch between guitars, which isn't great but should still be OK. Mostly, it's my pride that was injured.
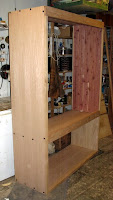 HOWEVER! The rest of the day went well, and we got the shelf and top assembled. Yes, the lengths are all correct now, thank you for asking. We then drilled all the holes for the quick-connect system. There are a lot of them, 72 to be exact, and we got all but one in the right place. I blame Dad, he had the drill and he's not here to dispute whether it was my marking of the hole or his placing of the drill...
 Anyway, holes all drilled, we dry-assembled the sides, base, shelf, and top, and by Crom it actually went together! I offer you pictures as proof. It's actually looking like it should. Er, maybe an inch or so narrower than planned.
Somewhere in there we also started laminating the curved hangers that will suspend the yokes (these fit snugly around the neck of each instrument where it swells out to form the headstock) directly below a bolt in a T-track along the inside top. All eight should be laminated by the end of the week.
Next we attach the back, finish the cedar lining, test the doors (which I pick up from the glass place tomorrow), and then disassemble the whole thing for finishing.
See, the top of the cabinet and the shelf across the middle (which forms the bottom of the actual humidifier and guitar display portion) each have a 2x4 running across the front. This provides stiffness and room for lighting and space for the glass doors to run in. The three cross-pieces (the base, the shelf, and the top) were all carefully cut to 54" wide, that being my determination of the optimal width in which to hang eight guitars without having them too close together or making the cabinet really huge. I mean, I still need space for bookshelves on either side, right? (To say nothing of the mini-bar.)
The tricky part, though, is that the 2x4 on the shelf has to have space cut out for the stiffeners on the sides of the cabinet... whereas the 2x4 on the top is supposed to overlap the sides (the stiffeners butt up against the top 2x4). So I carefully calculated the amount of 2x4 that would fit between the stiffeners (this is last Wednesday)... and then cut the whole thing off that length, which is a bit under 53". And then made cutouts for the stiffeners. I did this, you see, because I am dumb.
Now, it wasn't the end of the world; we hadn't assembled the shelf or the top. It was a pretty simple matter to trim the other pieces accordingly, and we were back on track in half an hour or so. I've lost around an eighth of an inch between guitars, which isn't great but should still be OK. Mostly, it's my pride that was injured.
 HOWEVER! The rest of the day went well, and we got the shelf and top assembled. Yes, the lengths are all correct now, thank you for asking. We then drilled all the holes for the quick-connect system. There are a lot of them, 72 to be exact, and we got all but one in the right place. I blame Dad, he had the drill and he's not here to dispute whether it was my marking of the hole or his placing of the drill...
 Anyway, holes all drilled, we dry-assembled the sides, base, shelf, and top, and by Crom it actually went together! I offer you pictures as proof. It's actually looking like it should. Er, maybe an inch or so narrower than planned.
Somewhere in there we also started laminating the curved hangers that will suspend the yokes (these fit snugly around the neck of each instrument where it swells out to form the headstock) directly below a bolt in a T-track along the inside top. All eight should be laminated by the end of the week.
Next we attach the back, finish the cedar lining, test the doors (which I pick up from the glass place tomorrow), and then disassemble the whole thing for finishing.
Monday, September 14, 2009
Guitar humidifier cabinet begins
 A few hours into the guitar cabinet, the sides are assembled and pretty much ready to finish. Here are a couple of views: on the left you can see an inside view of the sides, complete with aromatic cedar lining (it's gonna smell goooooood!).
The front side of the side (if you know what I'm saying) is on the outside of each piece in this photo, so if you rotated the outer edge 90 degrees toward you and the sides faced each other, you'd be looking at the front of the cabinet. The cutouts are for oak 2x4s that will hold the doors and strengthen the shelf and the top.
Oh, and the ugly grey stuff is foam mat, which is easier on the feet than a concrete shop floor. Used as illustrated it doesn't do as much for one's feet, but has the virtue of protecting the outer ply of precious oak veneer, which looks good, but is only slightly thicker than, say, cling-wrap.
 The second picture shows the outside of the sides; you can just make out the reinforcement/front edge strip of oak along the inside edges (which are the front edges once assembled, blah blah blah).
Next up: the bottom, the shelf, the top, the legend.
Side project
Courtney here with a quick note: the next couple of weeks will be devoted to a side project, which I will try to document with a few pictures. I've somehow accumulated a fair number of guitars and similar instruments, all of which really should be protected from extreme humidity or lack thereof (Winnipeg winters are very cold, which means our heated dwellings become very dry in winter). I've decided to build a big display cabinet to house, show off, and humidify my instruments.
The basic plan is a cabinet about 55" wide by 20" deep by 79" tall, with a compartment for case storage below the main compartment for display and humidification. The upper compartment will feature sliding glass doors, a lining of aromatic cedar, and eight custom laminated hanging yokes (to suspend the instruments from their pegheads) which slide in a track. It's also got lighting and a hygrometer, and the whole thing will be assembled with 1/4-20 quick connect hardware to facilitate moving.
I'm still trying to figure out how to work in a hot tub and a pony, but squeezing in a mini-bar seems like an insignificant challenge. Photos soon.
The basic plan is a cabinet about 55" wide by 20" deep by 79" tall, with a compartment for case storage below the main compartment for display and humidification. The upper compartment will feature sliding glass doors, a lining of aromatic cedar, and eight custom laminated hanging yokes (to suspend the instruments from their pegheads) which slide in a track. It's also got lighting and a hygrometer, and the whole thing will be assembled with 1/4-20 quick connect hardware to facilitate moving.
I'm still trying to figure out how to work in a hot tub and a pony, but squeezing in a mini-bar seems like an insignificant challenge. Photos soon.
Monday, September 7, 2009
As usual it's been busy...
 ...including trips to New Hampshire and BC. Back at work and back to work on the boat. Seat sides are installed, framed, and filleted on the inboard side. The fillets look a bit messy because we're not going to sand and paint until the inboard side is filleted too, which in turn is going to wait until we have more epoxy mixed up for the companionway lockers.
 The second photo shows the beginning of the framing around the tops of the companionway lockers (they're small things on either side of the CP case). Inside the framing is a raised bit (I'm thinking it's called a coaming but I'm probably wrong) over which the locker hatches (lids) fit, with the raised bit keeping water out of the locker itself.
Man, that doesn't make much sense. Oh well, watch for more pictures.
Thursday, May 28, 2009
Love this construction stuff!
 Here's the latest: fit the other seat side panel, and cut hatch holes in both seat sides. Not being all that familiar with routers, I think I'll wait for Dad to get back before I tackle trimming the hatch holes.
Sunday, May 24, 2009
OMG I THOT U WER DED!
No, just busy. Somewhere in the blur of the last couple of months we painted the inside of the boat a few times, and cleaned it all up and made it look pretty. Well, the clean-up and the pretty are almost done, anyway.
We're fitting out the cockpit now - yes, construction! Always a pleasure. A bit fiddly, the construction process; it goes something like:
1. Measure
2. Mark
3. Trim, but not too much! (I've misplaced the board stretcher)
4. Repeat. A whole bunch of times.
 Anyway, it's going well. Here's a picture of one of the seat-sides, loosely in place and ready to have hatch holes added to it (but that will be on Wednesday).
Oh, and now that there are actually interesting instances of actual progress to show, expect more updates. Er, that would be all two of you who are still checking this blog in the forlorn hope that I've updated it...
We're fitting out the cockpit now - yes, construction! Always a pleasure. A bit fiddly, the construction process; it goes something like:
1. Measure
2. Mark
3. Trim, but not too much! (I've misplaced the board stretcher)
4. Repeat. A whole bunch of times.
 Anyway, it's going well. Here's a picture of one of the seat-sides, loosely in place and ready to have hatch holes added to it (but that will be on Wednesday).
Oh, and now that there are actually interesting instances of actual progress to show, expect more updates. Er, that would be all two of you who are still checking this blog in the forlorn hope that I've updated it...
Monday, March 23, 2009
We're back!
Just a quick note to say we're back at work on the boat. The past month has been entirely too busy and the boat ended up on the back burner - not where it belongs! Got some solid work done yesterday and will be painting the interior Real Soon Now™. Watch this space for more regular updates and photos!
Tuesday, February 10, 2009
Sorry!
Been meaning to update the blog but life has been rather busy. Here's a quick crappy phone camera photo to show you what we're up to.
 Glassing the inside left some rough spots, which were cleaned up prior to filleting. Then we filleted the joints with thickened epoxy, masking the areas that will be bright-finished. We used the Ziploc baggie method of epoxy application, which I must say worked like a charm.
You can also see the bulwarks, which are getting their own fairing treatment. There's a bit of fillet sanding to do, and some final smoothing and sealing down around the bilges, and then I think we paint the interior.
So we're working, it's just not particularly photogenic or hugely indicative of progress.
 Glassing the inside left some rough spots, which were cleaned up prior to filleting. Then we filleted the joints with thickened epoxy, masking the areas that will be bright-finished. We used the Ziploc baggie method of epoxy application, which I must say worked like a charm.
You can also see the bulwarks, which are getting their own fairing treatment. There's a bit of fillet sanding to do, and some final smoothing and sealing down around the bilges, and then I think we paint the interior.
So we're working, it's just not particularly photogenic or hugely indicative of progress.
Sunday, January 11, 2009
Gunwales
Having finished glassing the inside of the boat, we can make all the dust we want. Today saw the top of the cradle removed for easy access, after which we used sabre-saw and belt sander to trim the gunwales:
 At some point we'll apply the outwale and then a cap rail (IIRC), but for now it's much easier to climb in and out... which we'll be doing many times as we finish off the interior. More later!
 At some point we'll apply the outwale and then a cap rail (IIRC), but for now it's much easier to climb in and out... which we'll be doing many times as we finish off the interior. More later!
Friday, December 26, 2008
Merry Xmould...
...or Chrimbo, or Solstice, or whatever it is you celebrate when the days get short and the air gets cold and the snow covers the ground and the booze becomes a necessity.
 We've had a fine time in Winnipeg and in Winnipeg Beach and of course out at Wavey Creek. Shilling work started two years ago today, officially, though it would not be fair to say we have two years of work into the build. We're almost done glassing the inside, so I thought I'd put up some pix of the latest. There are nine sections, between frames, on each side of the boat, and seven are now glassed. This is one of the forward sections, mostly finished.
 Tara finally got to experience the joy that is glassing, which was most fulfilling I'm sure; her enthusiasm knows no bounds, and she is now stoking it with a beer in front of the fireplace. This picture is one of Tara's sections... still wet but it looks good, eh?
More pix as developments warrant them. For now, stay warm, and drink lots. It helps.
 We've had a fine time in Winnipeg and in Winnipeg Beach and of course out at Wavey Creek. Shilling work started two years ago today, officially, though it would not be fair to say we have two years of work into the build. We're almost done glassing the inside, so I thought I'd put up some pix of the latest. There are nine sections, between frames, on each side of the boat, and seven are now glassed. This is one of the forward sections, mostly finished.
 Tara finally got to experience the joy that is glassing, which was most fulfilling I'm sure; her enthusiasm knows no bounds, and she is now stoking it with a beer in front of the fireplace. This picture is one of Tara's sections... still wet but it looks good, eh?
More pix as developments warrant them. For now, stay warm, and drink lots. It helps.
Tuesday, December 16, 2008
Upright!
 It took a while, but we have cleaned up the inside of the hull preparatory to glassing. Courtney, Tara, Buster, Cathy, and Ron (welcome back, Ron!) then turned the boat right side up. In the pictures you can see the lovely Tara standing in the cockpit and seated in what will be the cabin.
 Glassing the inside is next, probably a couple of long days this week as Courtney is on vacation. More updates soon, we're past the boring stuff!
Monday, November 17, 2008
Another rollover
 So a cast of thousands (well, over half a dozen, anyway) were out on Sunday to help roll the boat over onto her starboard side. Since the topsides now face away from the workbench, we can post a good photo of the interior.
 As you can see, most of the glue squeezeout on the port side has been cleaned up, and some of the starboard side as well. What's left should clean up pretty quickly now that we know what we're doing. (There is a wealth of comment on the whole building process in that one sentence, folks, if you care to dwell on it!)
 The final picture is a detail shot of the bulwarks and interior planking somewhere more-or-less amidships, inside what will be the cabin. The cabin side (below the deck shelf stringer in the picture) will be glassed and left bright, 'cause Tara wants it that way; this calls for a decent sanding job. The bulwarks we will paint white on the inside, so they're being filled and faired - you can see that the process is almost complete in the section above the deck shelf.
Many thanks to Peter, Trent, and Bruce & Shelly & kids - many hands make light work, and if the light don't work, we can't see to turn the boat over. Cheers!
Sunday, October 5, 2008
A linky, a linky!
No pictures, because the work we're doing right now is kind of boring and doesn't produce good visuals. We'll post pictures when the inside of the hull is cleaned up.
However, we would like to draw your attention to a new link in the links section. Sailing Margherita is the sailing blog for willowbayboy's Shilling. His is rigged out as a gaff cutter and is VERY striking. Check it out!
However, we would like to draw your attention to a new link in the links section. Sailing Margherita is the sailing blog for willowbayboy's Shilling. His is rigged out as a gaff cutter and is VERY striking. Check it out!
Monday, September 15, 2008
Rollover
 Yesterday was a LONG day of work - the longest in quite a while, as applying a coat of paint doesn't take long. Tara and Courtney and friend Tina (a traveler from Germany) headed out to Wavey Creek after breakfast to build the cradle that will hold the Shilling for the coming months of fitting out. The first picture shows the blue bulwarks with their last coat of paint.
 Working from a rough sketch we started work on the cradle, building a base of 2x4s and fitting the central beam to the keel. This part progressed kind of slowly, because Buster was busy installing new sliding glass doors to the deck upstairs and needed to use some of the same tools. It was a busy day at Twin Oaks.
 We had figured on about six hours to build the cradle, and it took all of that. The third photo shows the cradle partially constructed, with vertical posts long enough to support the boat upside down if need be. You can also see the beams running across the sheer - we'll remove them when we work on the gunwales, as the diagonal braces (not yet in place) should hold the boat securely when it's resting upright in the cradle.
 Buster, temporarily finished with door installation, applied his drawknife skills to said diagonal braces, giving a nice fit where they support the hull. They were the last pieces to be added to the cradle, which should be strong enough to hold the boat upside down, upright, or standing on either side.
 By the time we were done building the cradle it was time out for the usual Wavey Creek feast, with a cast of... well, not thousands, but Courtney's sister Lee was there, and her kids Tim and Heather, and three more helpers showed up for dinner and heavy lifting: Kyle (bass player in Courtney's band), his partner Carmella, and Courtney's colleague Colin.
 The next job was to remove all of the old construction frame, which took a little while - and a lot of work from Tara, crawling around under the boat. Here you can see Tina, Colin, and Kyle (well, Kyle's head), along with the finished cradle. Note the shop floor, which - with no construction frame - is cleaner than it's been for well over a year.
 The next photo shows the boat halfway to its side - you can't see much of the guys doing the heavy lifting on the far side. We held the boat roughly balanced there while a couple guys scuttled 'round and let it gently down onto its side. The whole rollover was completed in a minute or so, though the preparation had taken all day.
 With the boat resting neatly on its side, we had a good look at the inside and contemplated our next moves. Plenty of cleanup, there's lots of glue squeezeout on the inside, and then we have to fair and glass the inside, and then there's fitting out the cabin, and and and and...
 But it feels pretty good to reach this major milestone! The last shot shows Colin, Tara, and Tina checking out the interior, with Kyle looking on. Then it was all over except for the whisky and songs. Many thanks to our helpers, we know who you are and we'll be calling you again! Heheheheheh...
(Adjusted and updated the photos. Note to self: edit all photos on the good monitor at work! - CW)
Saturday, September 13, 2008
Rollover coming!
So the white Brightsides went on well, and after that two coats of dark blue on the bulwarks. We'll probably do another coat of each before we launch, just in case we nick or ding the paint during construction.
So our Shilling is ready to roll over so we can start fitting out the interior! We plan to build the cradle tomorrow and roll her over tomorrow evening (with friends to help and whisky to toast her afterward). We'll post lots of pictures tomorrow or Monday. W00T!
So our Shilling is ready to roll over so we can start fitting out the interior! We plan to build the cradle tomorrow and roll her over tomorrow evening (with friends to help and whisky to toast her afterward). We'll post lots of pictures tomorrow or Monday. W00T!
Subscribe to:
Posts (Atom)